
Melonpan
| Ingredient | 16 Buns | 16 Buns |
|---|---|---|
| Bread Dough | ||
| water | ½+⅓ cup | 200ml |
| egg | 1 | 1 |
| butter | 5 Tbsp. | 70g |
| bread flour | 2½ cups | 400g |
| powdered milk | 5 Tbsp. | 5 Tbsp. |
| salt | 1 tsp. | 5g |
| sugar | 3½ Tbsp. | 3½ Tbsp. |
| dry yeast | 1 tsp. | 1 tsp. |
| Cookie Dough | ||
| butter | scant 6 Tbsp. | 80g |
| sugar | heaping ½ cup | 110g |
| egg | 2 | 2 |
| cake flour | 2 cups | 280g |
| baking powder | heaping ½ tsp. | heaping ½ tsp. |
| granulated sugar | to coat | to coat |
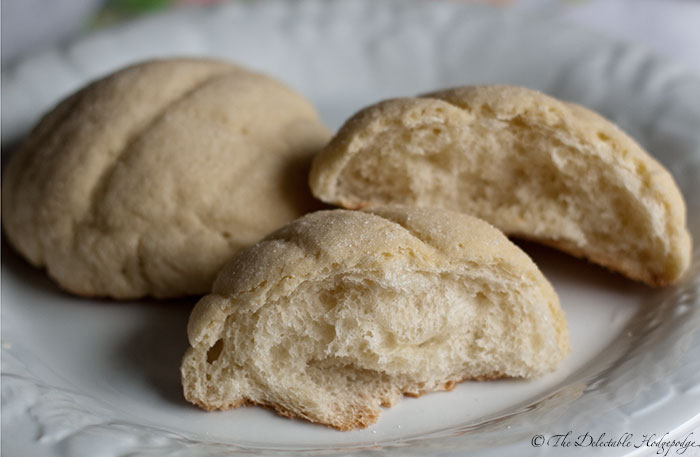
Melonpan, literally meaning “melon bread,” is a well-loved Japanese snack coincidentally similar to one type of pan dulce. Named “melon” for its muskmelon-like appearance rather than its flavor, these irresistible buns have a crunchy sugar-cookie shell and a fluffy, soft, lightly-sweetened bread center. The bad news is that they’re best when they’re fresh; the good news is that they’re so light and tasty that they’re unlikely to last long.
Preparation
- Let the butter and eggs come to room temperature.
Directions
- Make cookie dough.
- Whisk the flour and baking powder together in a bowl and set aside.
- In a separate medium-sized bowl cream the butter using an electric mixer or whisk.
- Add sugar to the butter and continue beating until well mixed.
- Briefly beat the eggs with a fork, then add them to the mixture in three or four portions, mixing thoroughly after each portion.
- Add the whisked flour to the butter mixture.
- Using a spatula or wooden spoon, gently stir with a cutting motion until combined into an even mixture; be careful not to knead it.
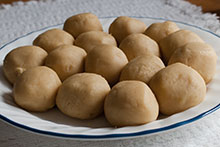 Divide the dough into 16 equal pieces and roll them into balls (each will weigh about 35g / 1¼ oz). Cover the balls with plastic wrap and put them in the refrigerator to rest for at least 30 minutes, up to overnight.
- Make bread dough.
- Add all the ingredients, in the order above, to your bread machine. Use the dough cycle and process according to the machine’s instructions.
-
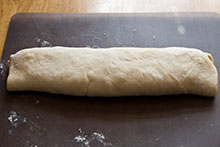
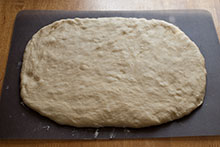
When the machine has finished, turn out the dough onto a floured work surface. Lightly punch it down and massage it into a flat shape to remove gas bubbles. Fold the flattened dough in thirds to form a loose roll.
-
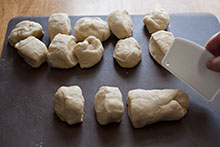 Slice the roll into 16 equal pieces and form each piece into a ball. Rather than rolling it into a ball, pull the outside of the dough down and stuff it into the underside, folding it in on itself, so that the top surface becomes round and taut.
 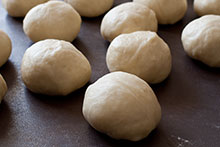 Place the balls, tucked side down, on a tray and cover them with a thoroughly wrung-out wet towel. Let rest for 20 minutes.
- Flatten the balls with your hand to deflate and remove gas bubbles, then re-form into balls by folding them in on themselves, as before. Pinch the bottoms tightly closed to keep them from unfolding when they rise.
- Assemble.
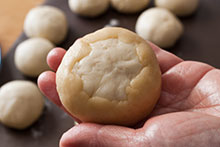
- Use your fingers to flatten each ball of cookie dough into a disk about 3 inches (7-8cm) in diameter; make them lens-shaped, with the middle thicker than the edges. If it’s too stiff or crumbly to work easily, let them sit at room temperature and, if necessary, work with your fingers a bit to smooth the dough.
- Lay each disk of cookie dough in your hand and place a ball of dough, pinched side up, in the middle of it. Gently stretch the cookie dough up over the dough while pushing the dough down into it, until the cookie dough covers the bread dough with an exposed circle on the top so it can rise without tearing the cookie dough coating.
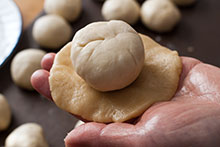
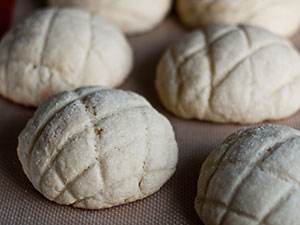
- Put some granulated sugar in a small bowl, and roll the surface of the cookie dough in it, pressing hard enough to coat it in sugar. Use a pastry scraper or similar semi-sharp object to score a checkered pattern into the cookie dough, being careful not to cut all the way through the cookie dough.
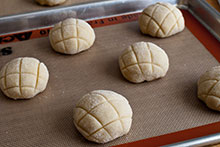 Put either a silicone baking mat or parchment paper on a cookie sheet and arrange the balls on it, widely spaced, with the gap in the cooke dough down. Put them somewhere warm to raise until they double in size, about 50 minutes.
- Bake.
- Bake at 350°F (180°C) for 15-17 minutes; take them out before they brown at all.
Notes
- Some recipes add a bit of melon oil or melon extract for flavor, but the bread is called “melon” because of its appearance, not its flavor.
- In the cookie dough, all-purpose flour can be substituted for cake flour.
- Since the cookie dough can rest overnight and a bread machine takes a while to knead the dough, the order you make the two components in isn’t important. You can get a head start by making the cookie dough the day before, or for the quickest production get the bread machine started, then work on the cookie dough while it’s kneading, then work on the bread while the cookie dough is resting.
- Ideally, you will stretch the cookie dough over the surface of the bread dough by sort of squeezing it with your hand to stretch it. If you’re having trouble with that, though, you can just flatten it into a roughly 4-inch (10cm) disk of even thickness, which is easier to wrap over the bread dough, no stretching necessary.
- While they won’t outright spoil, these buns are hard to store well. Cover too tightly, and the cookie dough quickly becomes soggy. Too loosely, and the bread will dry out.