Boston Cream Pie
| Ingredient | 7-inch Cake | 9-inch Cake | 18cm Cake | 23cm Cake |
|---|---|---|---|---|
| Cake | ||||
| all-purpose flour | ¾ cup | 1½ cups | 105g | 210g |
| baking powder | ¾ tsp. | 1½ tsp. | ¾ tsp. | 1½ tsp. |
| milk | ⅓ cup + 1 Tbsp. | ¾ cup | 90 ml | 180 ml |
| unsalted butter | 3 Tbsp. | 6 Tbsp. | 3 Tbsp. | 6 Tbsp. |
| vanilla extract | 1 tsp. | 1½ tsp. | 1 tsp. | 1½ tsp. |
| eggs | 2 | 4 | 2 | 4 |
| sugar | ¾ cup (3½ oz.) | 1 cup (7 oz.) | 100g | 200g |
| Syrup | ||||
| sugar | 2 Tbsp. | 3 Tbsp. | 2 Tbsp. | 3 Tbsp. |
| water | 2 Tbsp. | 3 Tbsp. | 2 Tbsp. | 3 Tbsp. |
| Cointreau | 1 Tbsp. | 1½ Tbsp. | 1 Tbsp. | 1½ Tbsp. |
| rum | 1 Tbsp. | 1½ Tbsp. | 1 Tbsp. | 1½ Tbsp. |
| Cream Filling | ||||
| crème pâtissière | one half batch (about 14 oz.) |
one batch (about 1¾ lbs.) |
one half batch (about 400g) |
one batch (about 800g) |
| Glaze | ||||
| heavy cream | ¼ cup | ½ cup | ¼ cup | ½ cup |
| light corn syrup | 1 Tbsp. | 2 Tbsp. | 1 Tbsp. | 2 Tbsp. |
| dark chocolate | 2 oz. | 4¼ oz. | 60g | 120g |
| white chocolate | ¾ oz. | 1 oz. | 20g | 30g |
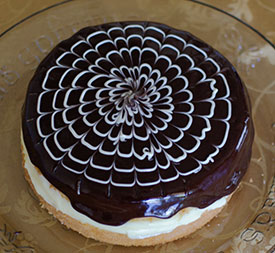
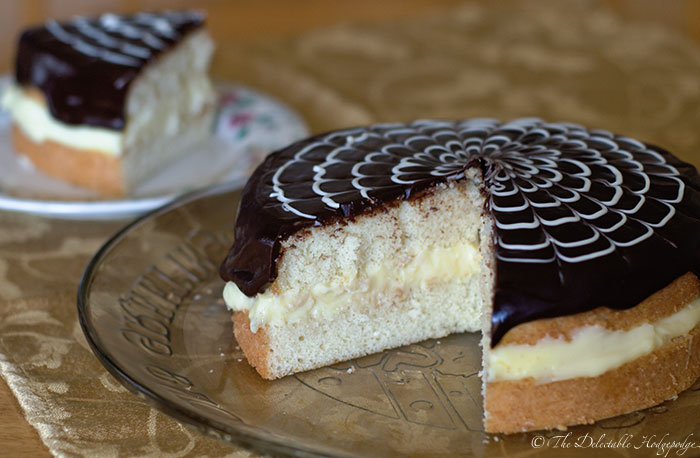
The Boston Cream Pie is, of course, not a pie at all—it is a classic cake that delivers the unique combination of moist sponge, custard filling, and a rich, dark chocolate glaze. This recipe, like many popular ones, uses a hot-milk sponge to deliver the moist, dense crumb that offsets the texture of the pastry cream. While it’s easy to stop with a simple glaze, the addition of a white chocolate flourish takes the presentation from merely enticing to hotel restaurant-fancy.
Preparation
- For the custard cream filling, make a batch of crème pâtissière; a full batch according to the linked recipe will fill one 9"/23cm cake, while a half-batch will be enough for a 7"/18cm cake.
- Lightly butter the inside of a round cake pan of appropriate size, then coat with flour and tap out any excess flour.
- Put a circle of parchment paper cut to fit the bottom of the pan in it.
- Let the eggs come to room temperature.
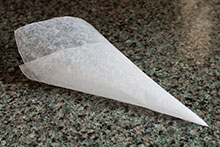 Make a small pastry bag out of wax paper: cut a small rectangle of wax paper and roll it into a relatively narrow cone with a closed tip, then tape the seam on the outside so it holds its shape. If necessary, you can also tape the seam at the top of the inside. Leave the tip closed; you will cut it open after filling it.
Directions
- Bake cake.
- Whisk flour and baking powder together in a medium bowl.
- Put the milk and butter in a saucepan and heat over low heat until butter is melted.
- Remove milk and butter from heat, stir in vanilla extract, cover, and set aside.
- Lightly scramble eggs in a large mixing bowl. Add sugar and mix with an electric mixer on high speed until fluffy, about 5 minutes.
- Add the warm milk mixture to the egg mixture and mix by hand using a whisk until blended together. Add the dry ingredients and continue mixing with whisk until blended; mix gently, being careful not to overmix. Switch to a spatula at the end and fold a few more times.
- Pour mixture into the prepared cake pan and bake in preheated 350°F (180°C) oven until top is lightly browned and a toothpick or cake tester inserted near the center comes out clean; about 30-35 minutes for a 7"/18cm cake, 35-45 minutes for a 9"/23cm cake.
- Immediately after removing the cake from the oven, hold the cake pan right side up about 8" (20cm) above a table or counter, and drop it so it lands flat; this will prevent the cake from falling.
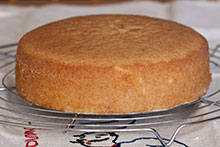 Place the cake pan on a wire rack and allow to cool completely in the pan.
- Make syrup.
- Mix sugar and water for syrup in a small microwaveable bowl. Microwave on high until sugar dissolves completely.
- Allow sugar mixture to cool, then add rum and Cointreau and stir to mix.
- Assemble cake.
- Remove the cake from the cake pan, remove the parchment paper from the cake, and carefully cut it through the middle into two equal discs.
- Dab half of the syrup into the sliced surface of each half of the cake. Soak a good amount of syrup into the brush and dab it on so that it soaks into the sponge, rather than using brushing motions.
 As noted on the custard recipe, stir the custard until creamy. Place the bottom half of the cake cut side up on the serving plate and use an offset spatula to distribute the custard evenly over the top, bringing it right out to the edge (don’t worry, it shouldn’t squeeze out when you put the top half on).
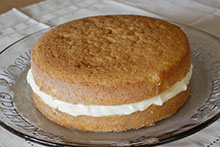 Put the top half of the cake, cut side down, on top of the custard layer and push down just a bit to even it out and get it to stick.
- Put the cake in the refrigerator while preparing the glaze.
- Prepare glaze.
- Mix heavy cream and light corn syrup in a small saucepan. Heat until simmering over medium heat, then remove from heat.
- Add chocolate and stir with a whisk until chocolate melts completely and mixture is smooth.
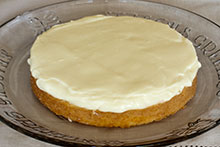
- Decorate cake.
- Pour chocolate glaze onto the top of the cake in the center. Use an offset spatula to spread the glaze evenly across the top, and let it drip partway down the side; do not smooth the sides, and don’t let it cover the sides completely.
- Before the glaze cools, heat the white chocolate in a small microwave-safe bowl until melted, stopping to stir occasionally. Be careful not to overheat it.
- Transfer the melted white chocolate to the wax-paper pastry bag, then twist the top off to seal and remove most of the air. Cut a very small piece of the tip off (the hole should be about a sixteenth-inch/1mm).
- Pipe a series of concentric rings of white chocolate onto the top of the cake. Using a toothpick, cake tester, or the tip of a sharp knife, drag the point from the outside edge to the center of the glaze about every half-inch/1cm; this should create an attractive scalloped pattern as long as the glaze hasn’t set yet.
- Chill and serve.
- Chill cake for two or three hours to let the glaze set before slicing.
Notes
- We think the glaze is best with extra-dark or bittersweet chocolate, at least 60% cacao.
- When doing the white chocolate decoration on top, if you drag the toothpick from the center to the outside edge, it will look more like a spider web; a famous Boston hotel recommends decorating the cake this way. Or, you can alternate in and out strokes to produce a floral pattern. Or omit the white chocolate entirely for more traditional look.