
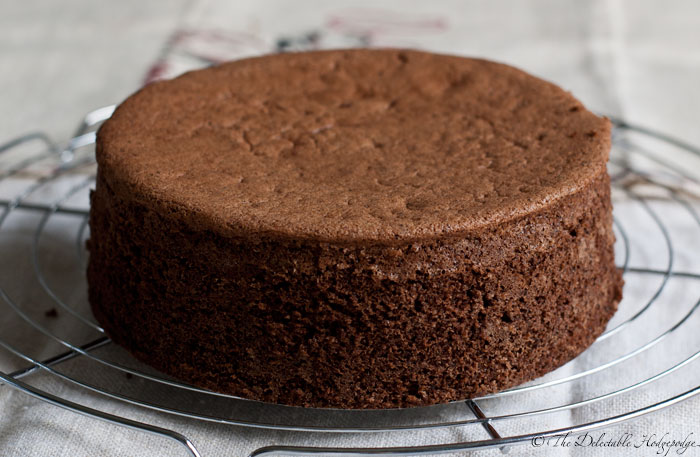
Sponge Cake Genoise Chocolat
| Ingredient | 7-inch Cake | 9-inch Cake | 18cm Cake | 23cm Cake |
|---|---|---|---|---|
| cake flour | heaping ½ cup (2.5 oz.) | scant 1 cup (4.2 oz.) | 70g | 120g |
| cocoa powder | 1 Tbsp. (0.7 oz.) | 2 Tbsp. (1.4 oz.) | 20g | 40g |
| egg | 3 | 5 | 3 | 5 |
| egg yolk | 1 | 2 | 1 | 2 |
| sugar | ½ cup (3.2 oz.) | ¾ cup (5.3 oz.) | 90g | 150g |
| butter | 2 Tbsp. (1 oz.) | 3 Tbsp. + 1 tsp. (1.75 oz.) | 30g | 50g |
This takes a light, melt-in-your-mouth sponge cake and adds a chocolate finish, resulting in a refined cocoa treat.
Preparation
- Lightly butter the inside of a round cake pan, then coat with flour and tap out any excess flour.
- Put a circle of parchment paper cut to fit the bottom of the pan in it.
- Sift the cake flour and cocoa powder together 2 or 3 times.
- Let the eggs come to room temperature.
- Heat water for the water bath to 60-70°C (150°F).
- Melt the butter in a small bowl in the microwave.
- Preheat the oven to 180°C (350°F).
Directions
- Whip eggs in a warm water bath until frothy.
Crack the whole eggs and egg yolk(s) into a large bowl. Beat together lightly. Place the bowl into a larger pan of water that is somewhat hot to the touch (60-70°C/150°F) and beat with an electric mixer on low until the eggs become frothy. - Beat sugar into eggs.
Still in the warm water bath, use an electric mixer set on low to beat the eggs while adding the sugar in two or three portions, allowing sugar to mix well before adding more. - Remove from bath and whip.
When the mixture has warmed to about body temperature, remove the bowl from the water bath. Place the bowl of butter in the bath to keep it warm. Whip the egg mixture at high speed for about 5 minutes. Reduce speed to medium and continue beating for another 5 minutes. The mixer should leave a ribbon-like trail at this point. Reduce speed to low, and beat for another 5 minutes to break up larger bubbles and smooth the texture; the mixture should look shiny and fall in a ribbon when you lift the mixer. Keep in mind that these times are just for reference; the texture is what’s important. - Sift the flour into the egg mixture and fold together.
Sift one half of the flour and cocoa mixture into the bowl from as high above the bowl as you can. Fold as gently as you can into the batter, being careful not to deflate the foam. Sift in the other half and fold gently until well mixed. - Add butter.
The melted butter should be about 50°C (120°F). Get a heaping spatula-full of batter and scrape it into the melted butter; mix well. Add the mixture into the batter and fold gently until mixed. This method makes it easier to mix the butter in, and makes use of any stiff batter that has stuck to the spatula from the previous step. - Pour batter into pan.
Pour the batter into the center of the pan. The batter that sticks to the bowl will be less fluffy so won’t rise as well; pour the batter scraped out of the bowl around the edge of the pan, where it will cook more readily. - Flatten surface.
Using a spatula, gently smooth the top of the batter. With the pan setting on a flat surface, give it two or three sharp twists without lifting it, to flatten it without any shock. Finally, lift the pan and drop it gently onto the surface one or two times to break any large bubbles. - Bake.
Bake at 180°C (350°F) for 25-30 minutes. To check if it’s done, press the center gently with three fingers; it should feel spongy and make a bit of a crackling sound, and a slight depression should remain. If it only feels soft, it’s not done yet. - Drop the pan on a flat surface, then cool.
Immediately after removing from the oven, hold the cake pan right side up about 20cm (8") above a table, and drop it so it lands flat; this will prevent the cake from falling. Put the pan upside-down on top of a paper towel on a wooden cutting board to cool slightly, about 5 minutes. Remove the cake from the pan, but leave the parchment paper on. Let cool completely, right side up, on a cake rack. Once it is completely cooled, cover the cake (or wrap it in a plastic bag) to keep it from drying; remove the parchment paper when you’re ready to use it.
Notes
- As with most confections, the ingredients used should be measured precisely; use a scale if at all possible. Although an English conversion is provided, I recommend using the metric version of this recipe, as it was originally done in metric (the 23cm version is equivalent to a 9-inch pan).
- The fresher the eggs, the better the cake will turn out.
- In place of a warm water bath, you can put the bowl over a pot of boiling water and let the steam warm it, but be sure not to let the boiling water touch the bowl with the eggs.
- Do steps 1-8 as quickly as possible; the longer the batter sits, the more the foam will deflate.
- Dropping the cake before cooling it to prevent it from falling seems contradictory, but it isn’t. The shock breaks the walls of the tiny bubbles of cooked egg within the cake. Air can then enter the bubbles as the cake, and the air within, cools, allowing them to retain their shape and retaining the cake’s shape. If the bubbles are left intact, they will be compressed by the outside air pressure as the hot air within them contracts, and the cake will shrink somewhat.